
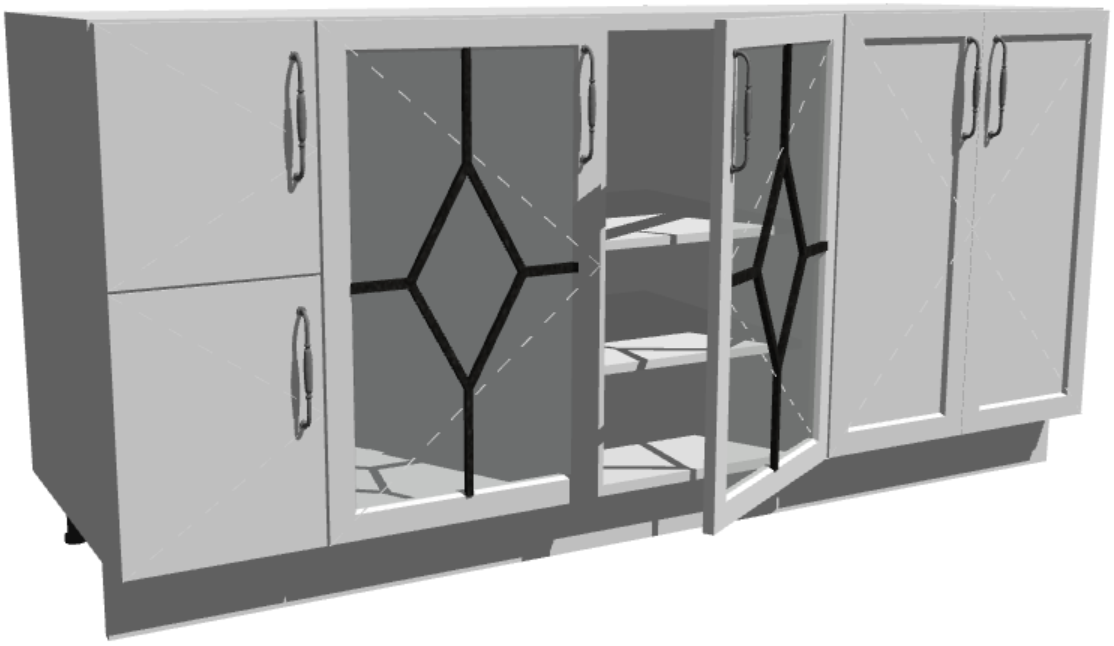
Create Custom Muntins
To create custom muntins/glazing bars:
- Use the Line tool in plan-view, to draw a rectangular region into which the muntins should fit.
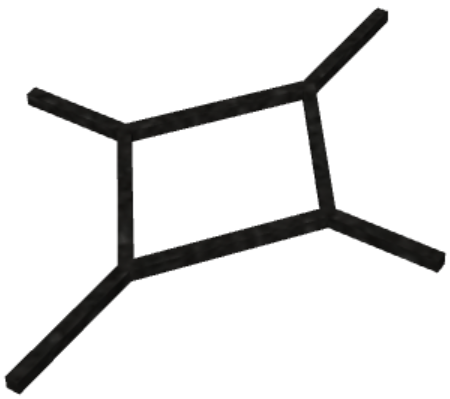
- Model the muntins within the rectangular region, using ARCHICAD building elements (e.g. the Slab tool).
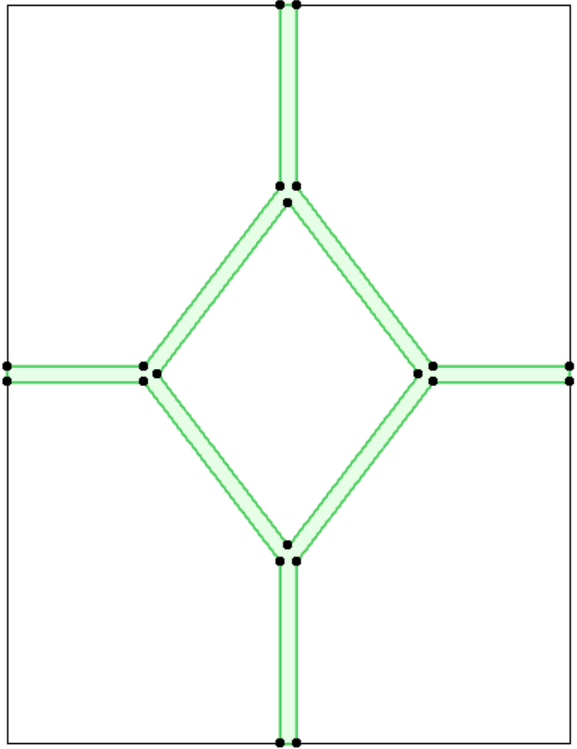
Make sure you choose the correct surfaces.
- Select the muntins, and from the File menu choose Libraries and Objects > Save Selection as > Cabinet Muntins.
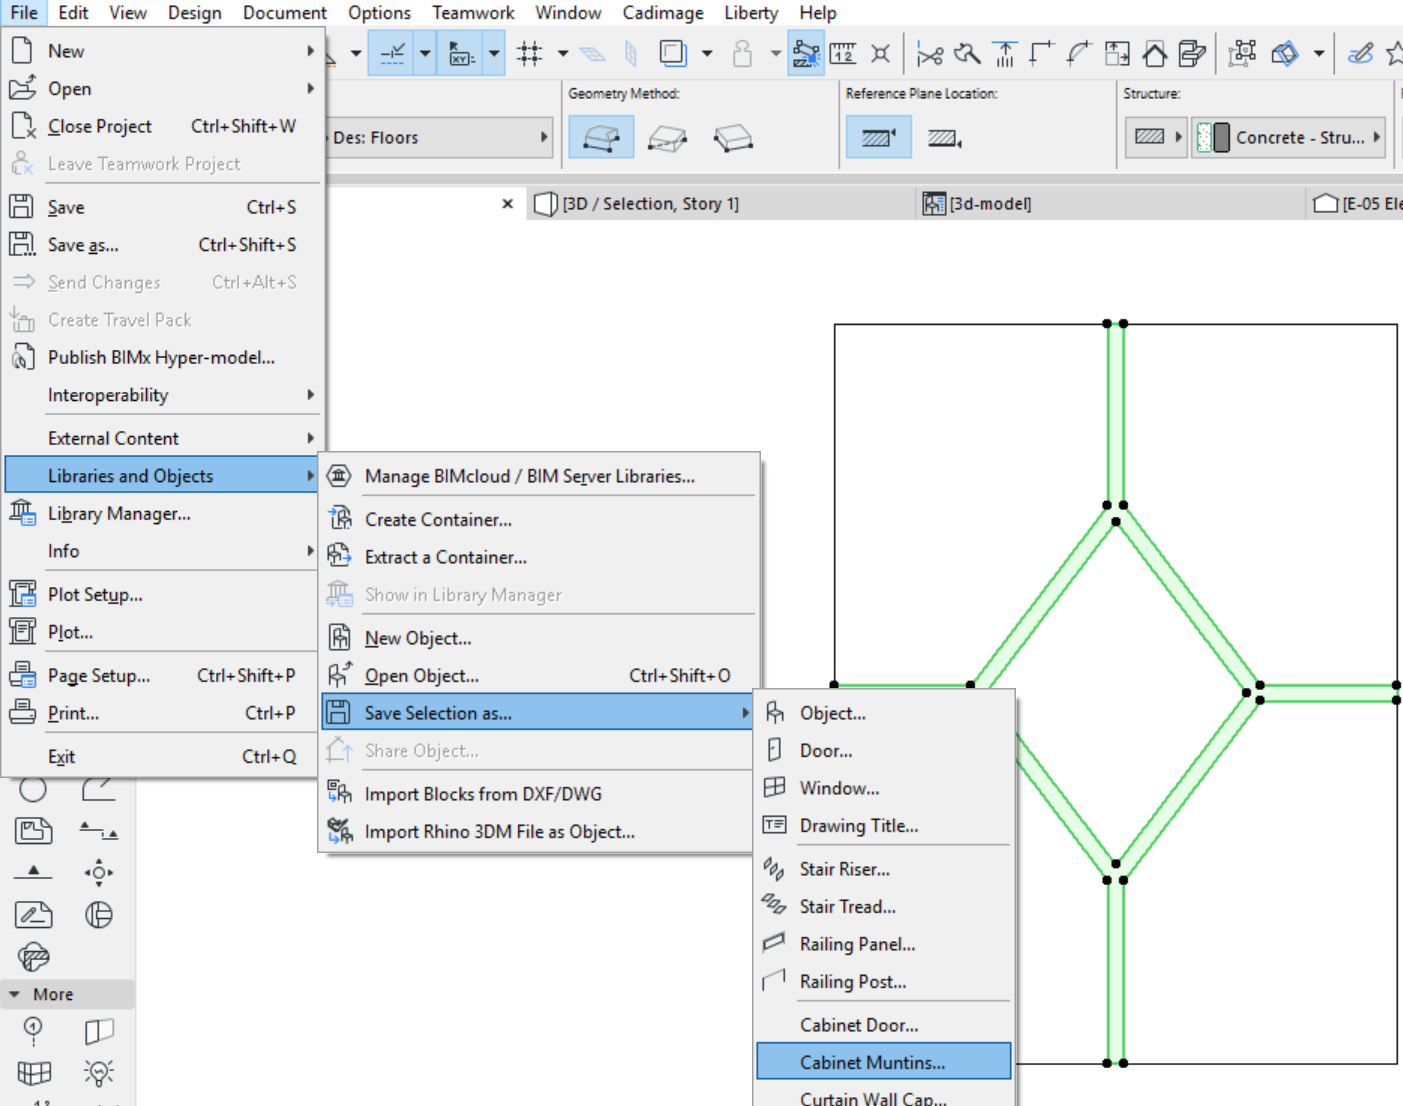
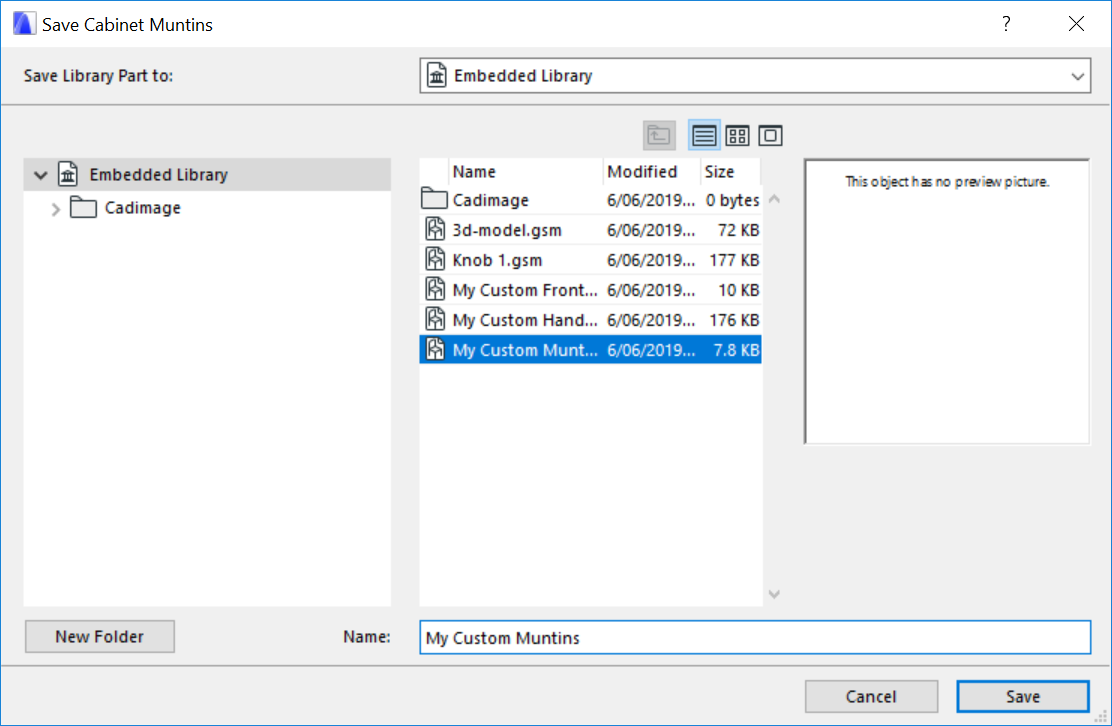
- Give the new muntins a meaningful name (i.e. not My Custom Muntins), and click the Save button.
Apply Custom Muntins to an Available Front
Having created custom muntins, the next step is to apply them to one of the Available Fronts.
- Select the cabinet in which you want to use the new muntins, and open its Settings dialog.
- On the Available Fronts page, select an existing front that has a glass panel, or add a new one.
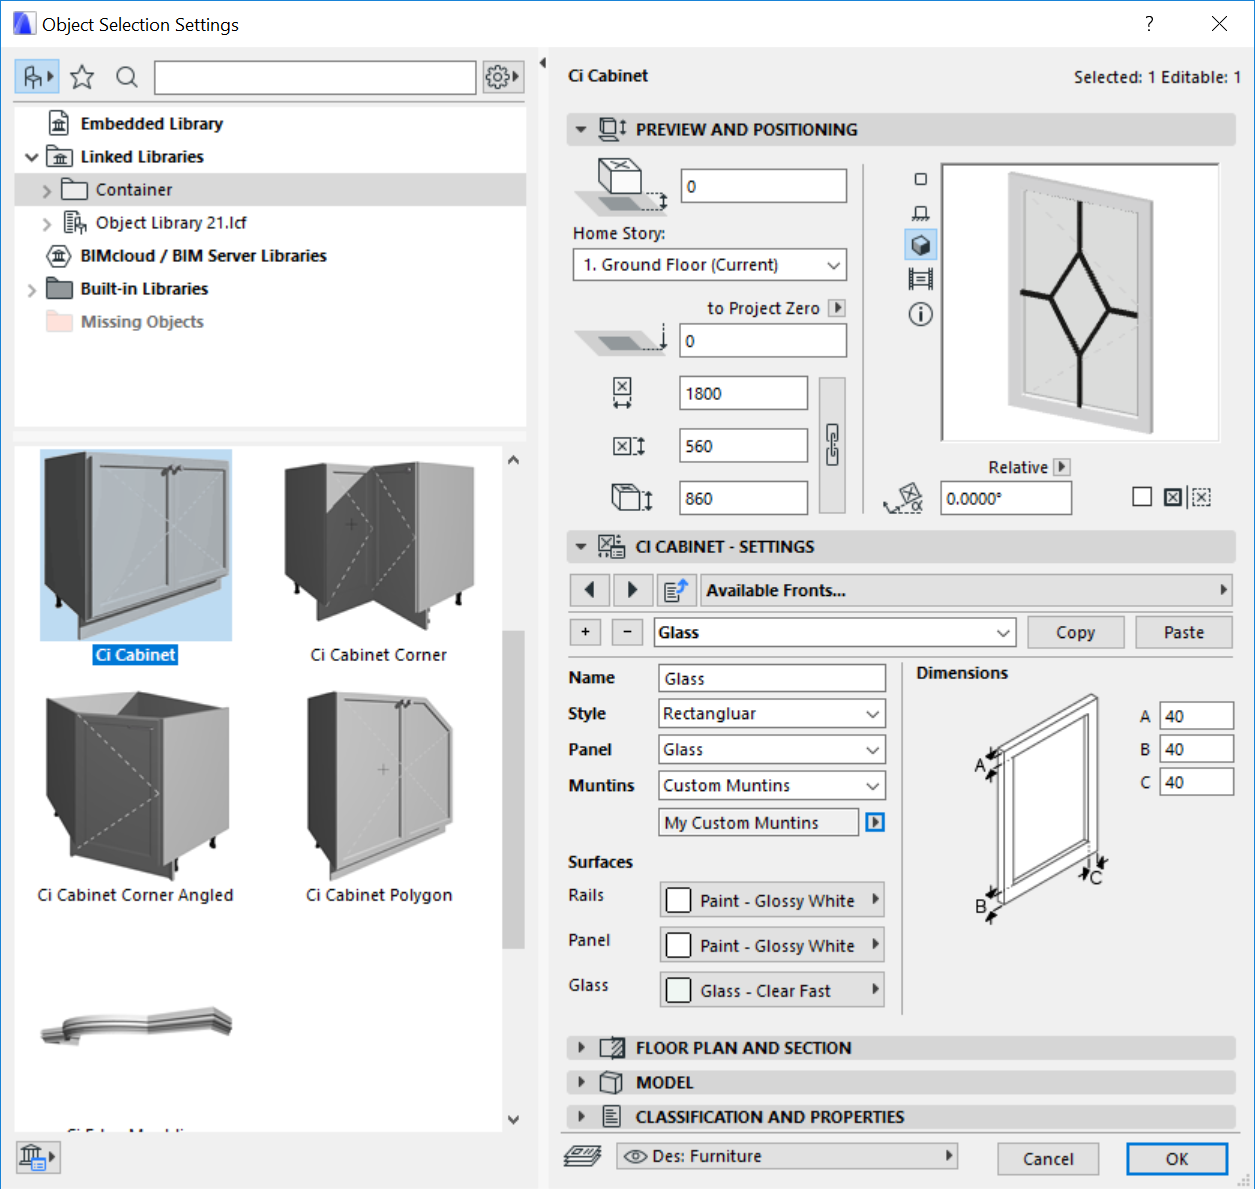
- Set the Muntins field to Custom Muntins.
- Choose your new custom muntins from the list.
Use the Front
To apply the front containing custom muntins to selected modules:
- On the Modules page, click to make a selection of modules.
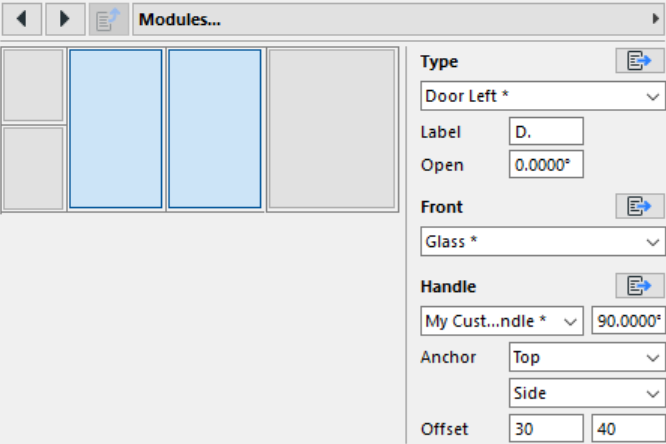
- From the Front list, choose the front that contains custom muntins.
- Click OK to apply the settings.
Share the Front
To share the front, including its new custom muntins, with other cabinets in the project:
- Select a cabinet that uses the front, and open its Settings dialog.
- On the Available Fronts page, click the Copy button.
- Click OK to close the dialog.
- Select any other cabinet in which you wish to use the front, and open its Settings dialog.
- On the Available Fronts page, click the Paste button. The front, including the custom muntins, will be added to the list, and is ready for use within the selected cabinet.
Comments
0 comments
Please sign in to leave a comment.