
Partitions may be inserted into a cabinet to divide it into units and modules, and to add shelves and horizontal dividers within modules. In order to use the CI Cabinet tool effectively, you need to understand how to work with partitions.
Note that partitions may also be added, removed and moved within the library-part Settings dialog - see How to Partition a Cabinet in the Settings Dialog.
Special Functions for the CI Cabinet Object
The CI Cabinet object provides some special functionality to make it easier to quickly place a set of rectangular units in a plan view. This supports a workflow in which multiple units are drawn as a single entity, so as to convey design intent without scheduling separate units.
Add Partitions when adjusting the Cabinet Width
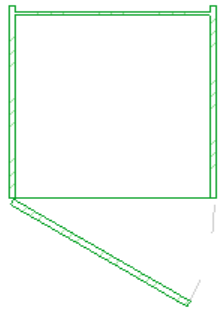
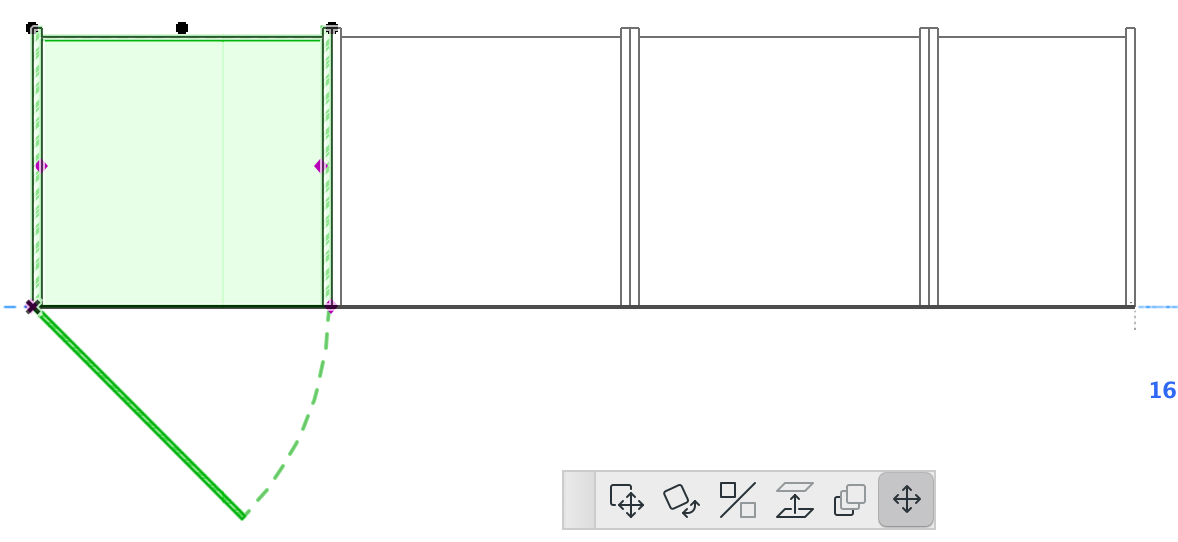
On first placement, the Ci Cabinet Linear includes a single unit.
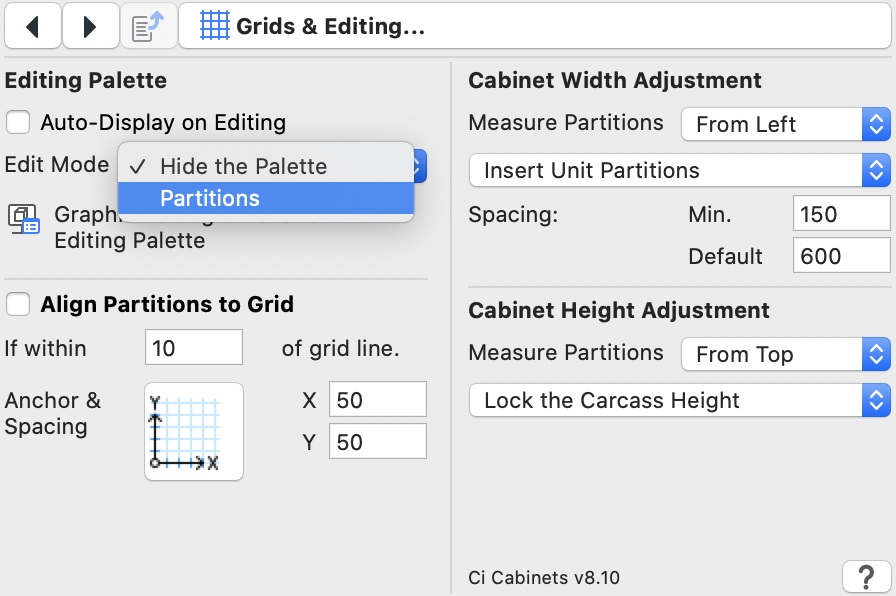
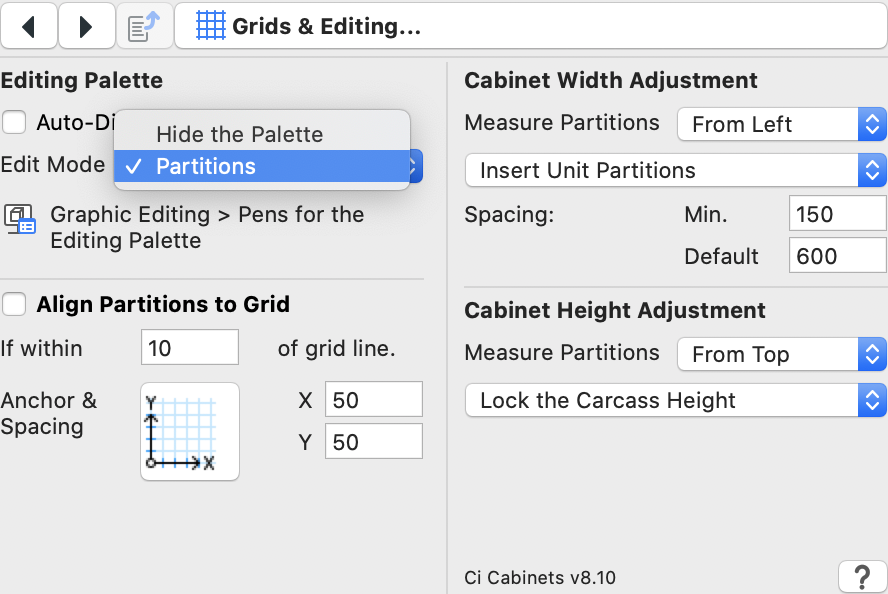
On the Grids & Editing page, under Cabinet Width Adjustment, choose how you want the cabinet to behave when stretched in plan view.
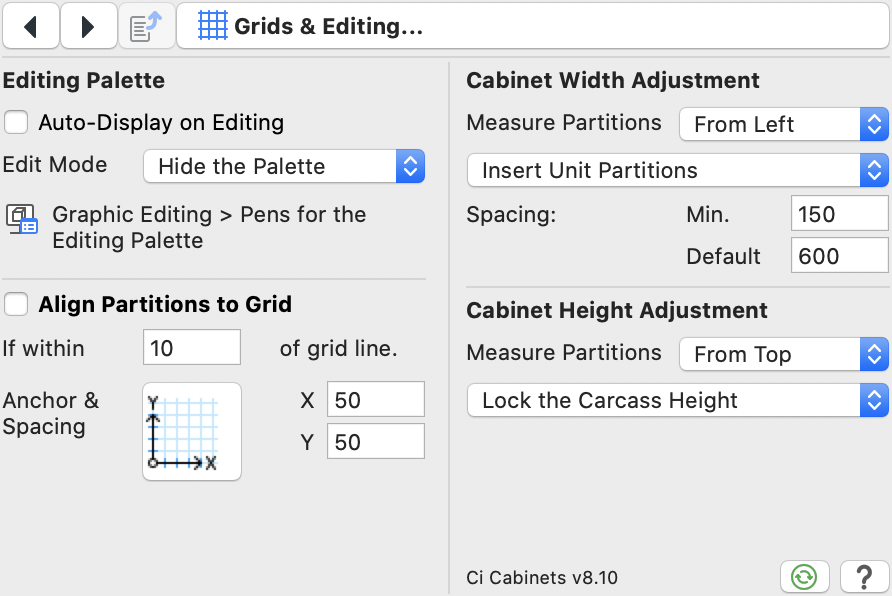
Under Cabinet Width Adjustment, choose what partition type should be inserted when increasing the cabinet's width:
- Insert Unit Partitions - a unit partition will be inserted whenever the cabinet's width increases beyond the default spacing, provided the remaining width exceeds the minimum spacing.
- Insert Module Partitions - a module partition will be inserted whenever the cabinet's width increases beyond the default spacing, provided the remaining width exceeds the minimum spacing.
- Insert No Partitions - the cabinet width will adjust without inserting partitions.
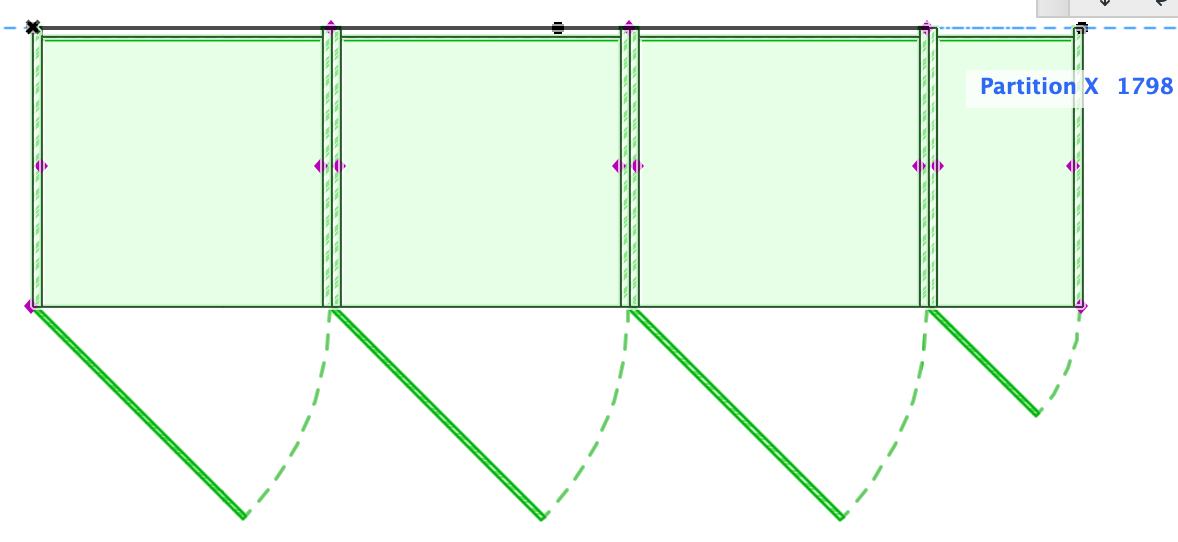
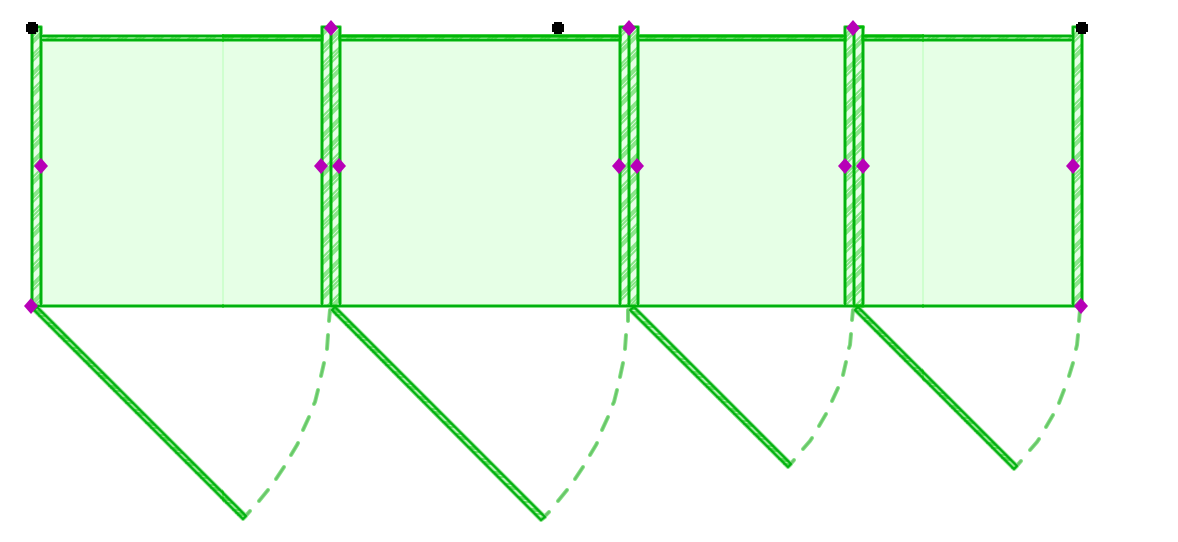
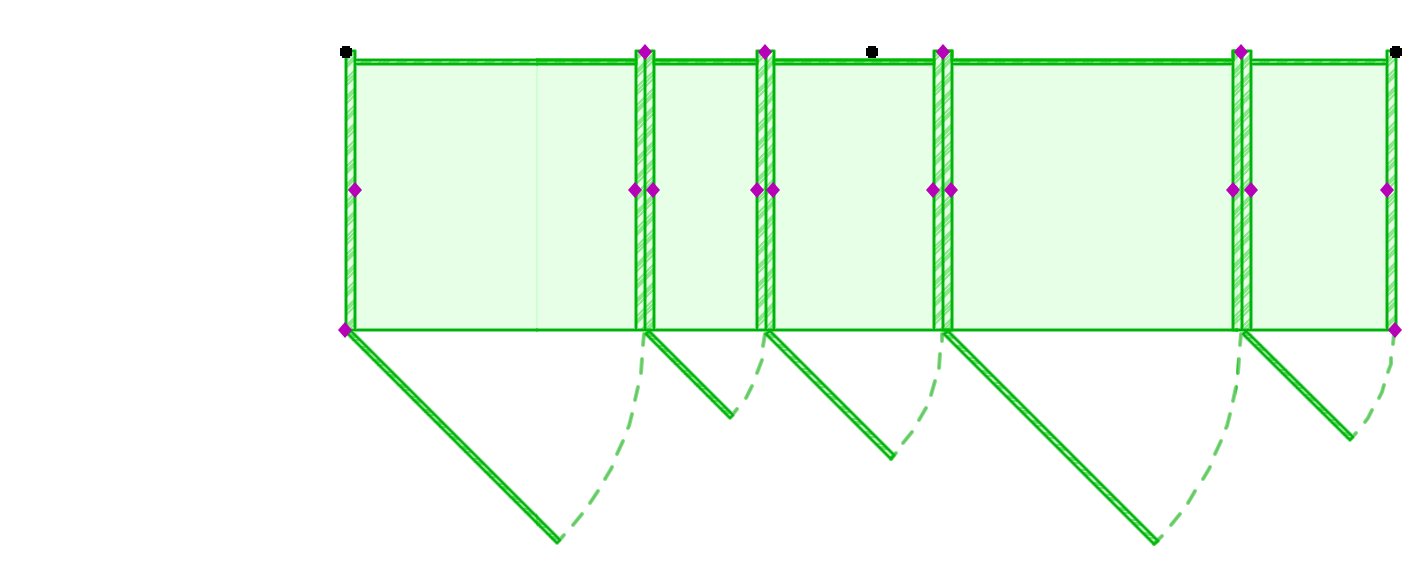
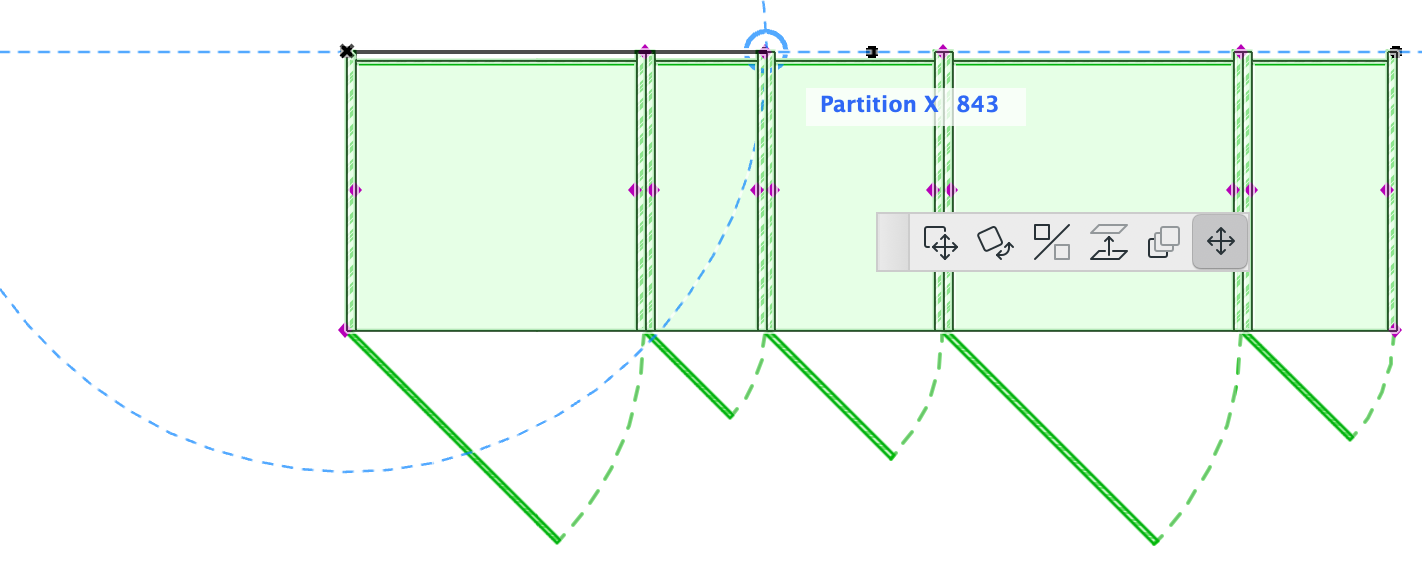
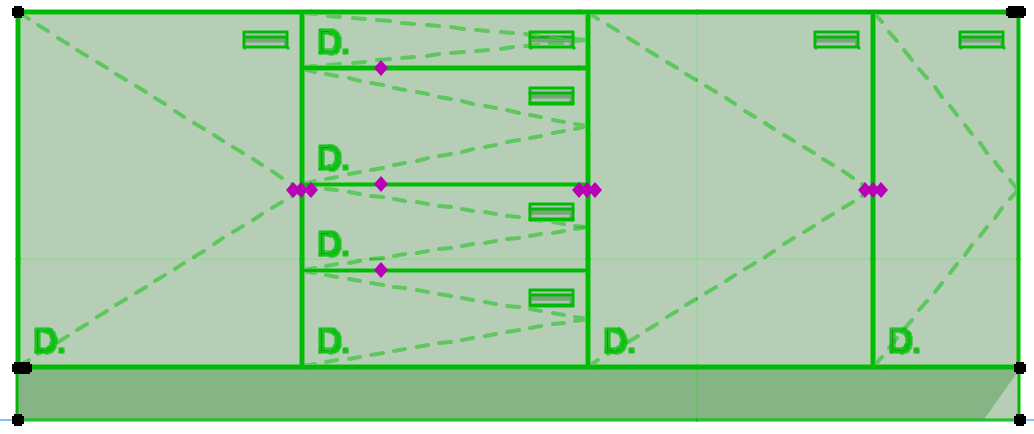
Use the end hotspot at the front of the cabinet, to adjust the cabinet's width. Extra units are added at regular intervals.
A new unit partition is inserted each time the cabinet length extends beyond the Default Width. The final unit will fit the remaining space. If this remaining space is too narrow (i.e. less than the Minimum Width), the last partition will be omitted, resulting in a wider unit.
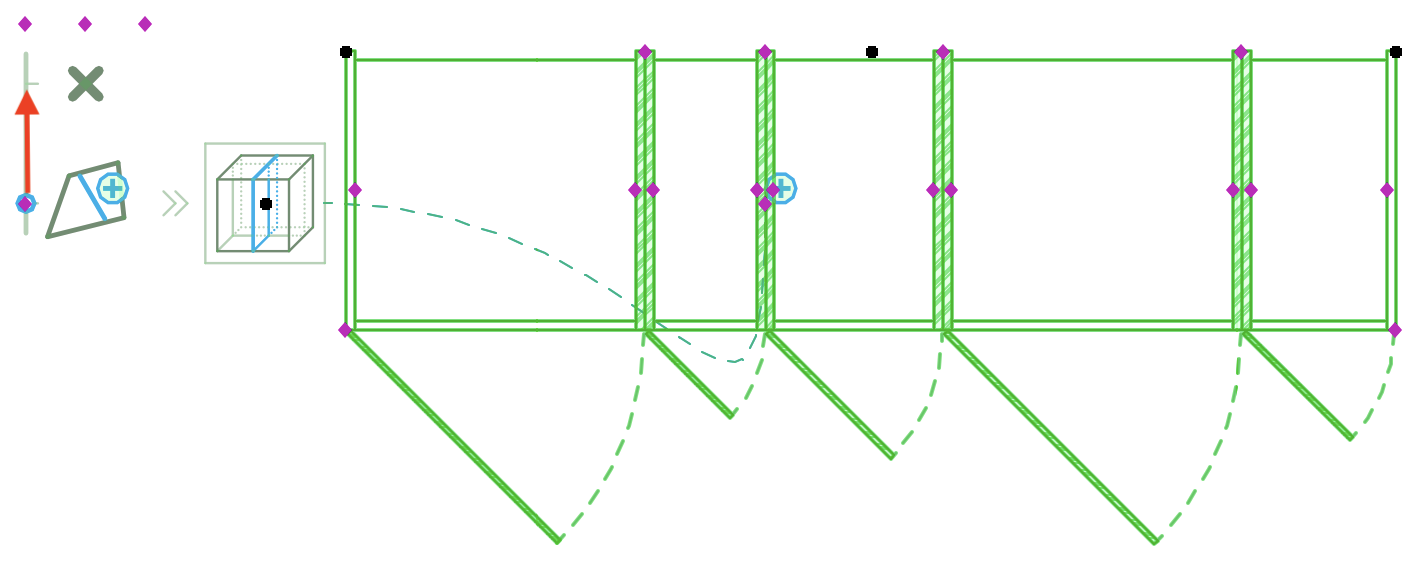
Move a Unit Partition in Plan-View
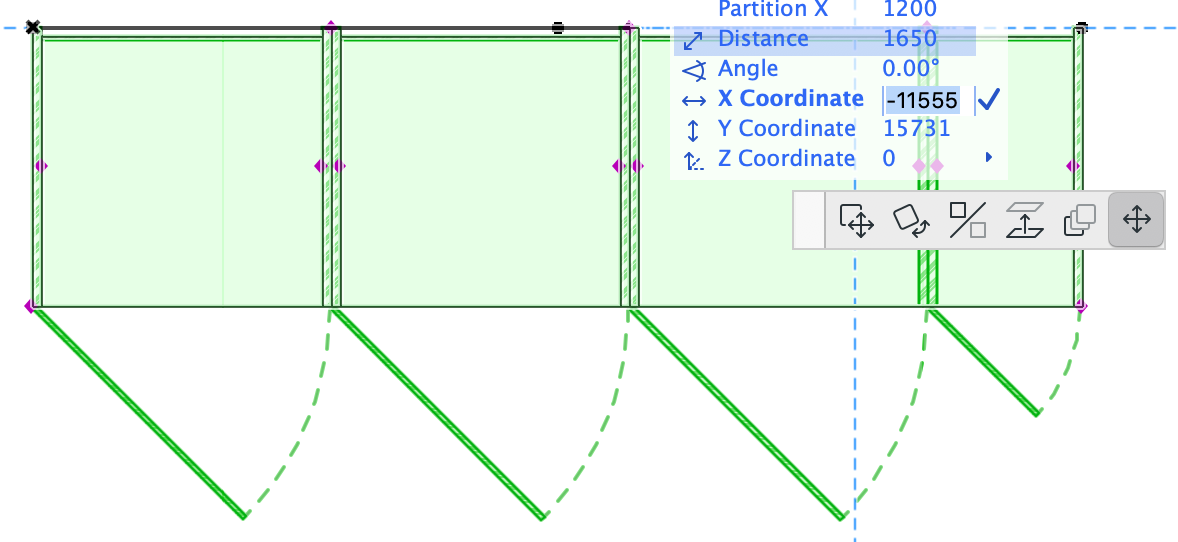
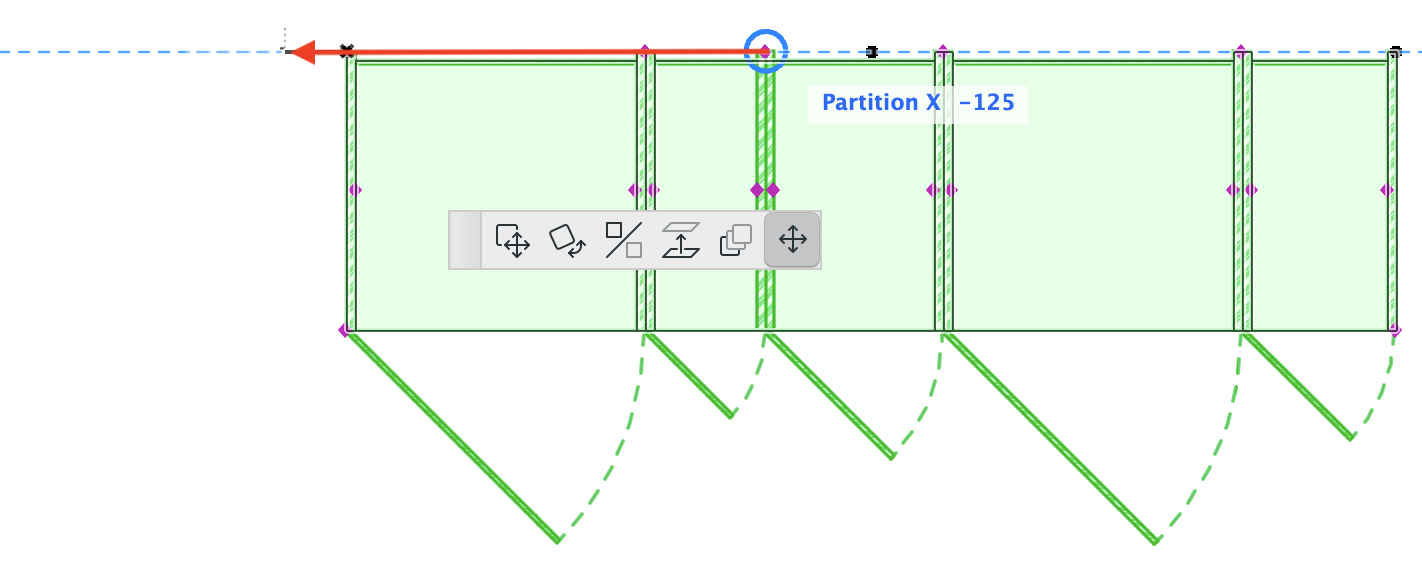
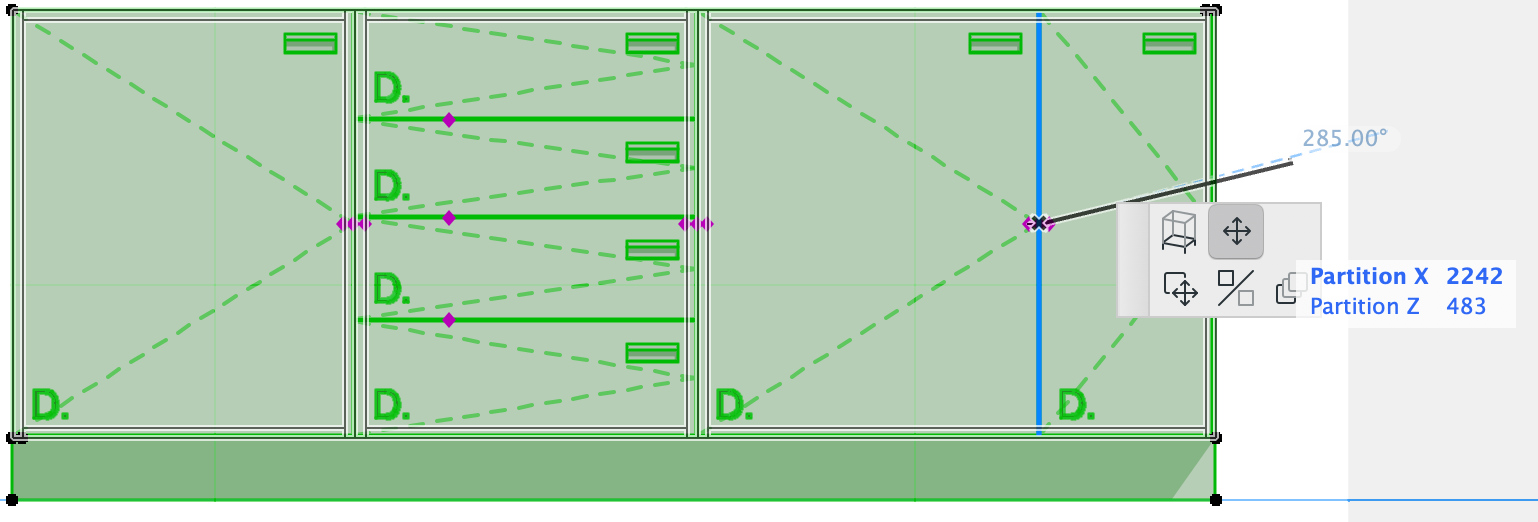
Having stretched the cabinet to the correct length, you can adjust the positions of the unit partitions.
- Select the cabinet, and click on a dynamic hotspot at the back edge of the unit partition you want to move.
- Move the partition and click to drop the hotspot, or enter the position via the keyboard.
Add a Unit Partition in Plan-View
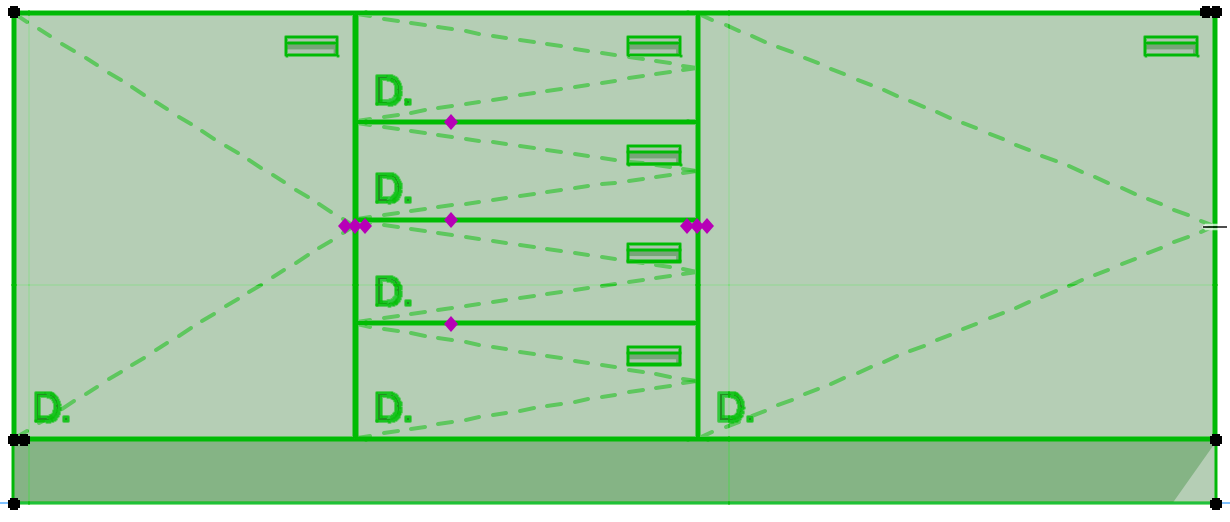
You can add a vertical unit partition while in plan-view.
- Select the cabinet in plan-view.
- Open the library-part's Settings dialog, and on the Grids & Editing page set the Editing Palette > Edit Mode to Partitions.
- Click OK. The editing palette will appear beside the cabinet.
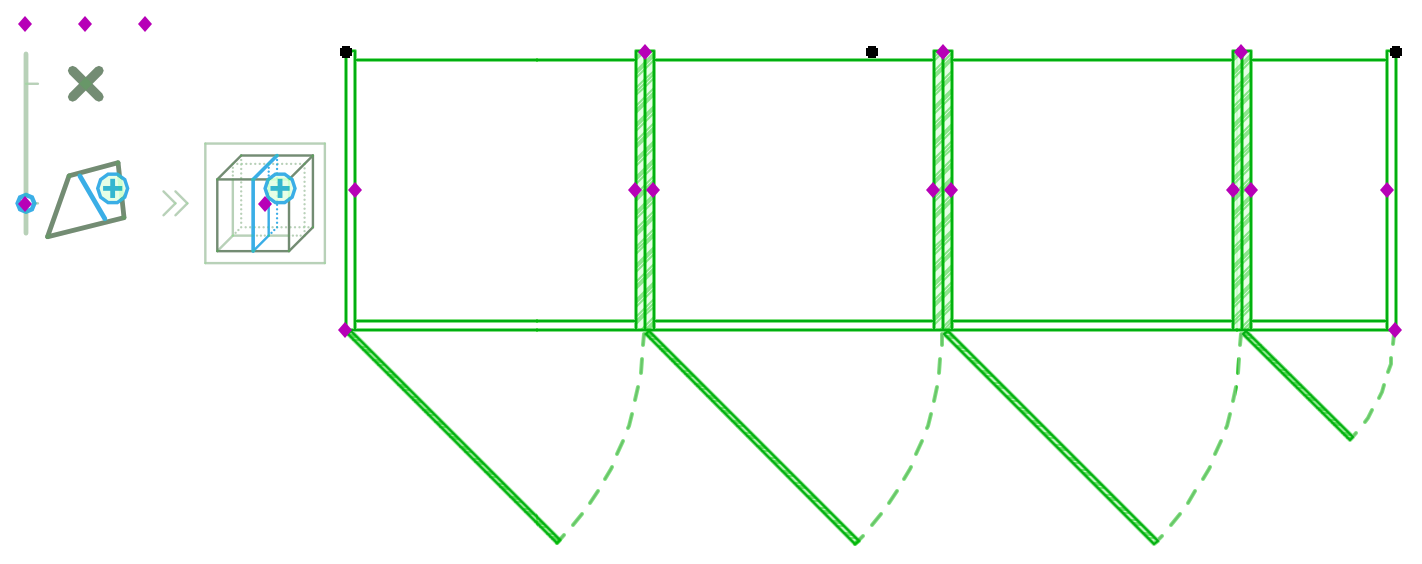
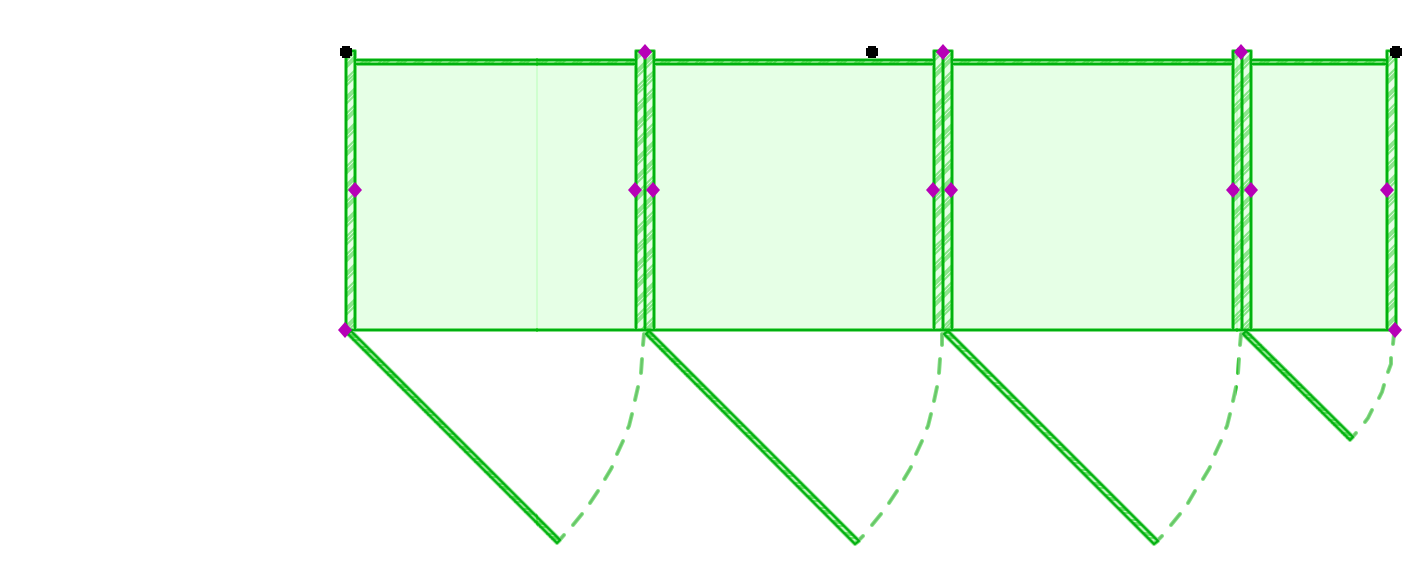
- Drag the unit partition icon from the palette into the cabinet plan view, to add a partition.
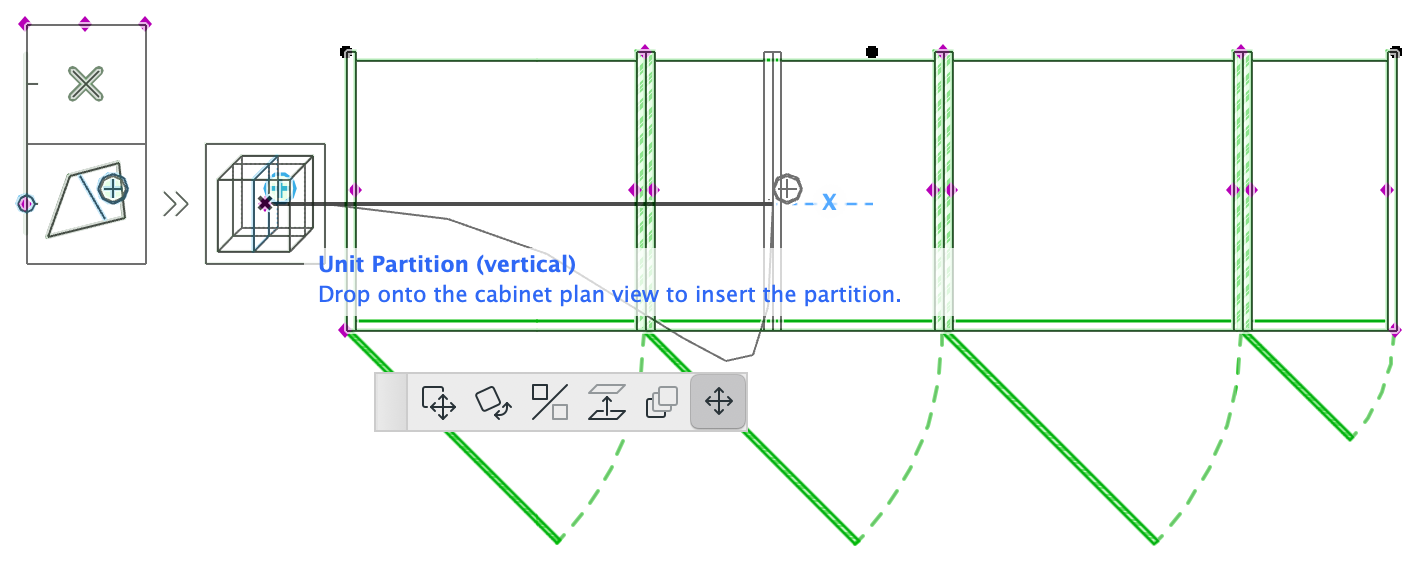
- Move the palette slider to the X position to hide the palette.
Remove a Unit Partition in Plan-View
To remove a vertical unit partition:
- Select the cabinet in plan-view.
- Click on the hotspot at the back edge of a unit partition, and drag the partition out of the cabinet. The partition will disappear.
General Partition Functions for all Cabinets
All cabinets in the CI Cabinets library provide functionality to split the cabinet with vertical and horizontal partitions. Each partition may define the boundary of a unit or module, or the position of a shelf or divider.
Add a Partition
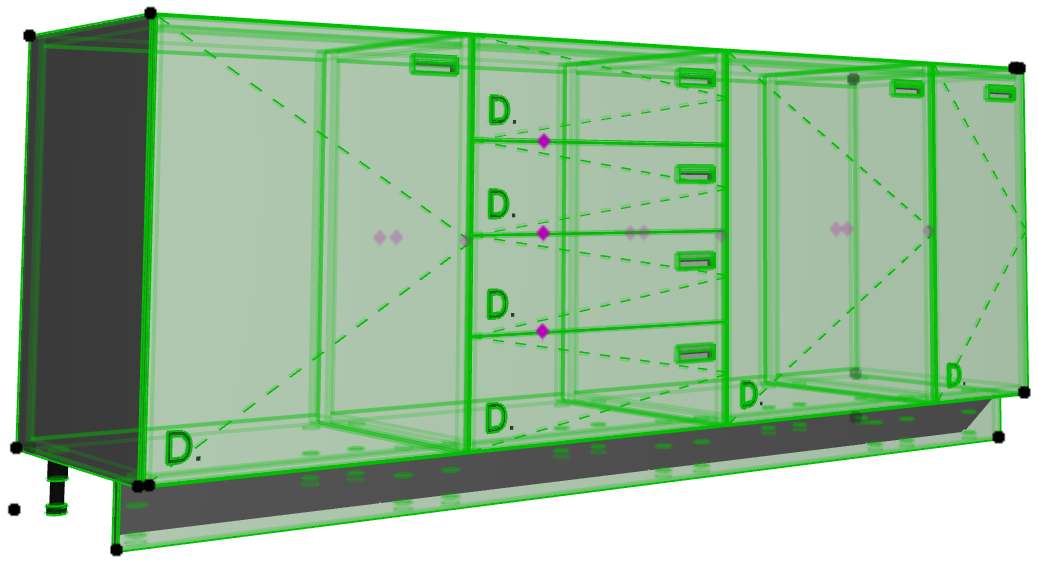
Partitioning may be carried out in a 3D, Elevation or Section view.
- In a 3D view (or in a Section or Elevation view), select the cabinet that you want to partition, and open its Settings dialog.
- On the Grids and Editing page, set Editing Palette > Edit Mode to Partitions, and click OK.
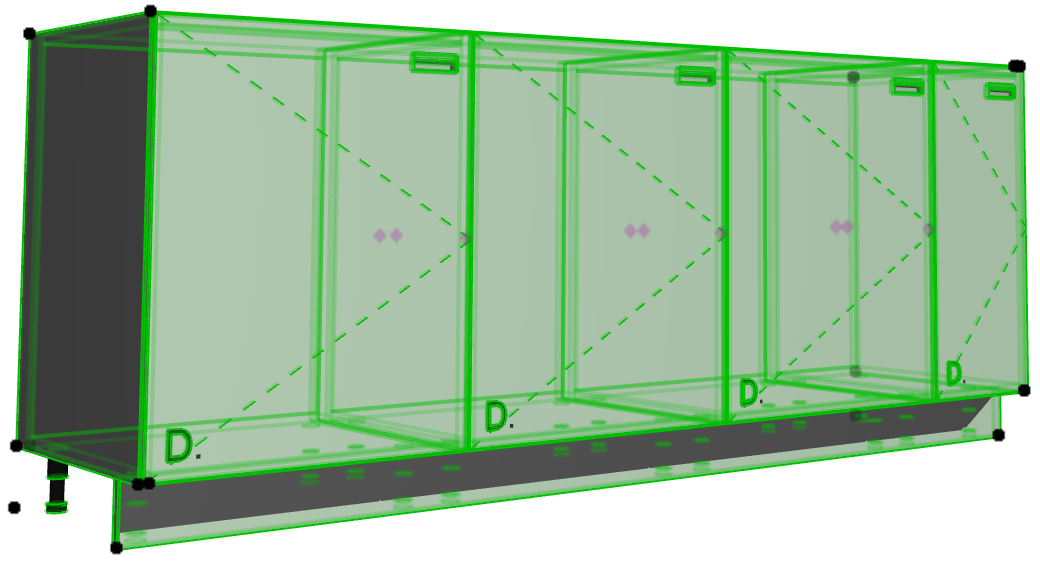
- You’ll notice some changes:
- An editing palette will appear near the cabinet.
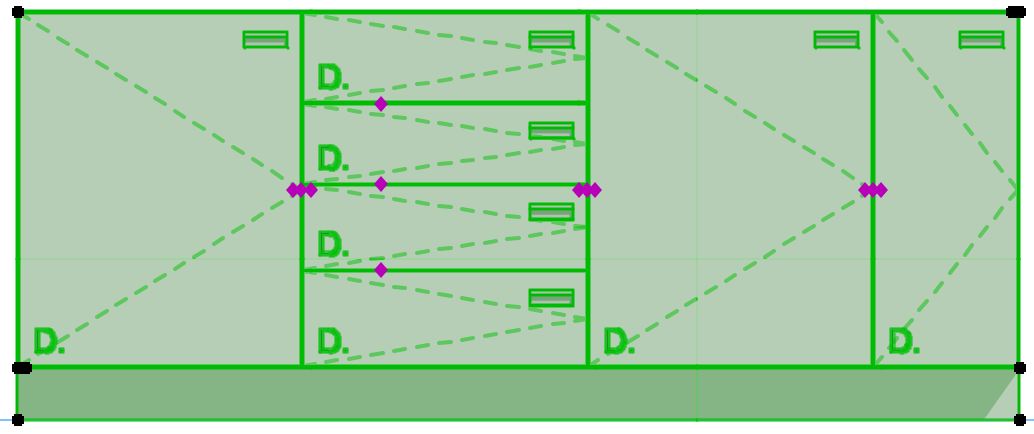
- The cabinet will be drawn in wireframe.
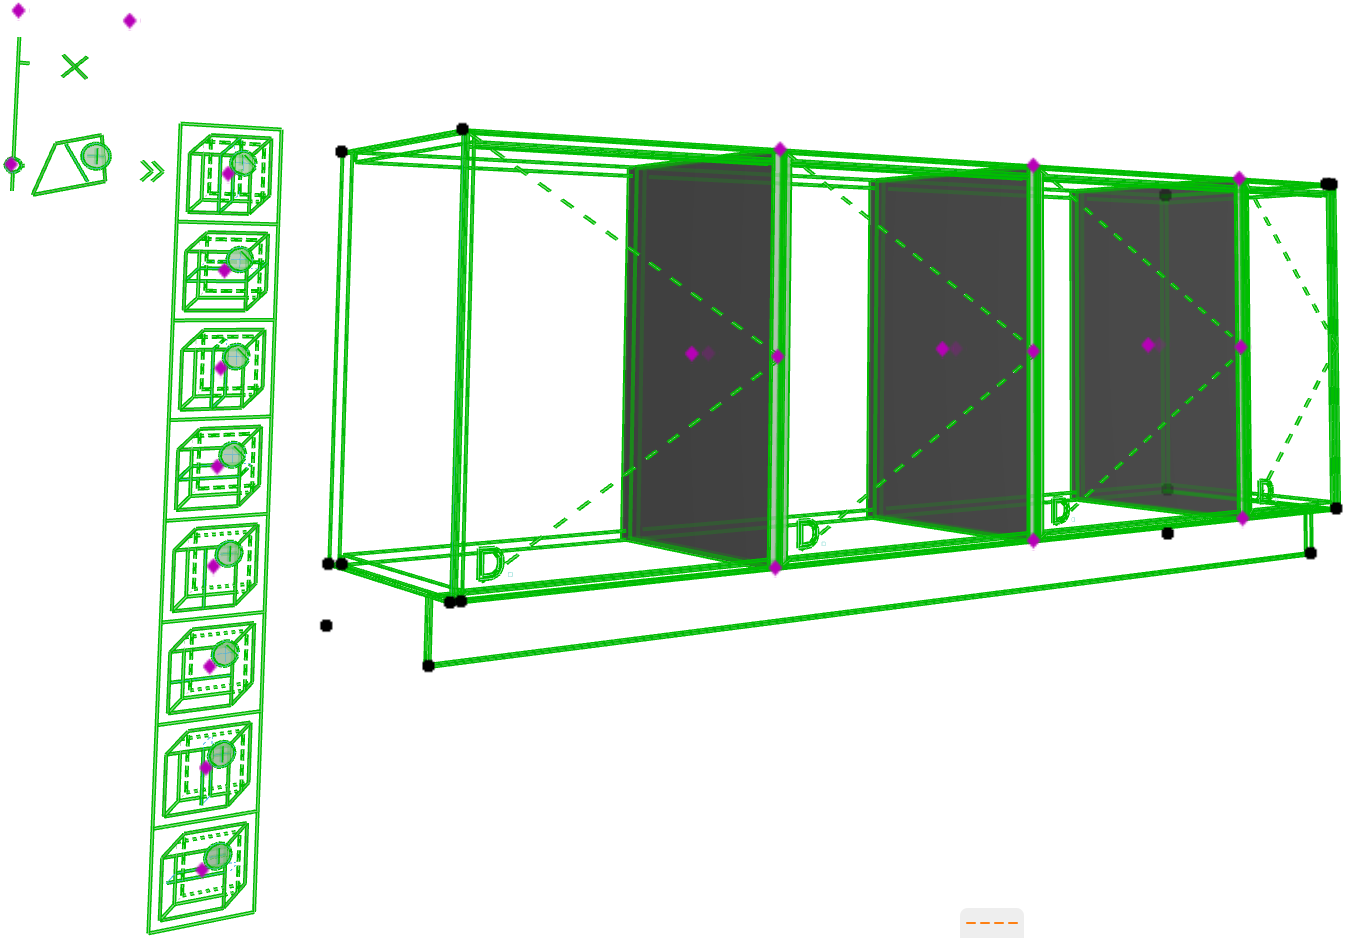
From top to bottom, the partition types provided by the editing palette are:
- Unit partition (vertical)
- Unit partition (horizontal)
- Module partition – closed (vertical) – includes a partition wall within the carcass
- Module partition - closed (horizontal) – including partition wall within the carcass
- Module partition – open (vertical) – no partition wall
- Module partition – open (horizontal) – no partition wall
- Internal divider (vertical) – a vertical divider within a module
- Internal shelf (horizontal) – a shelf or rail within a module
-
Drag a hotspot from the editing palette onto the front face of the cabinet. As you do so, you will see that a partition is created at the hotspot position.
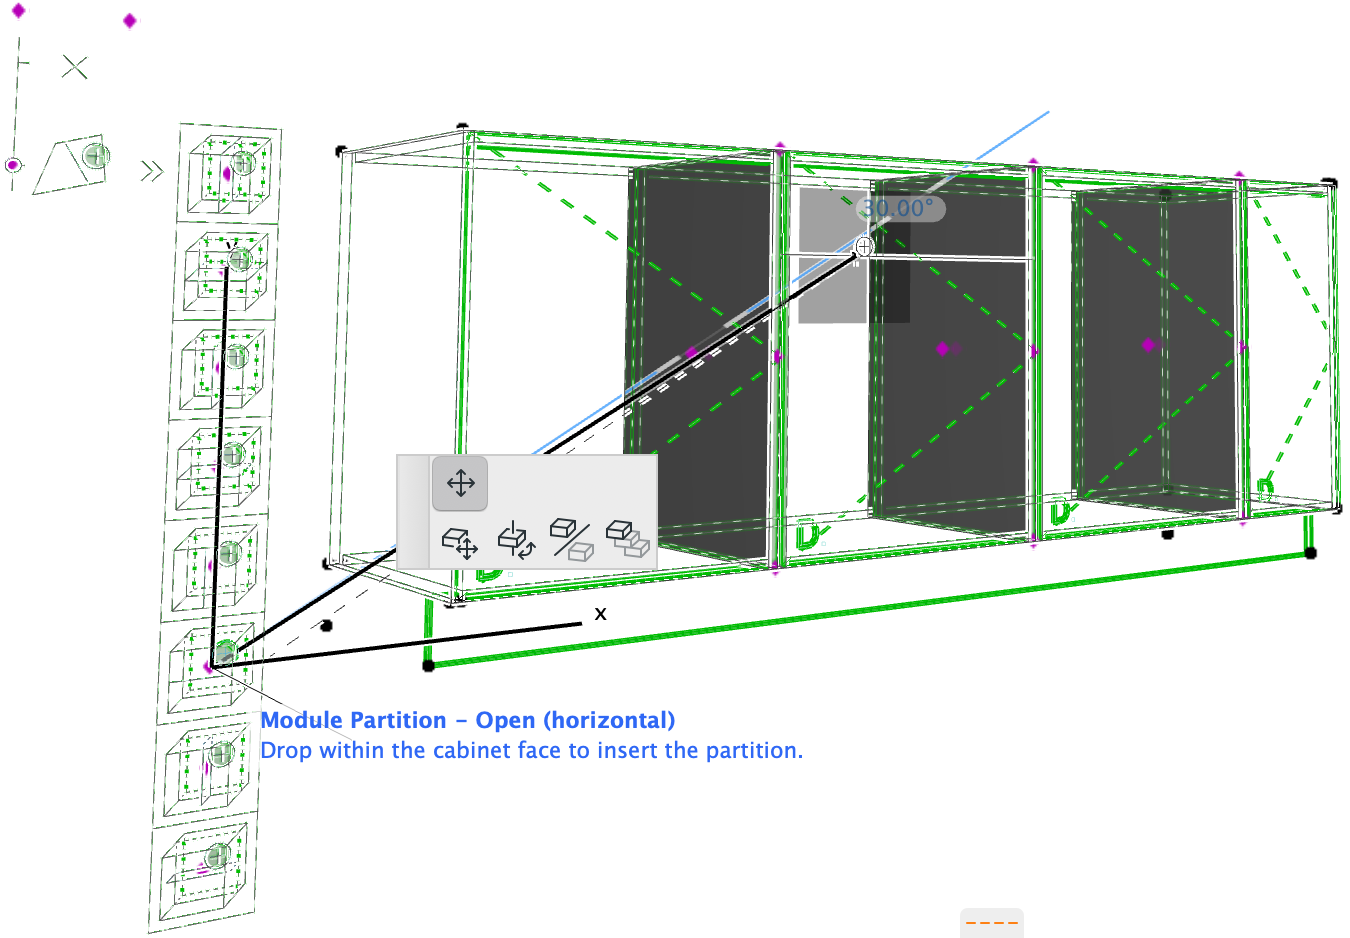
-
Drop the hotspot at the desired position to create the partition.
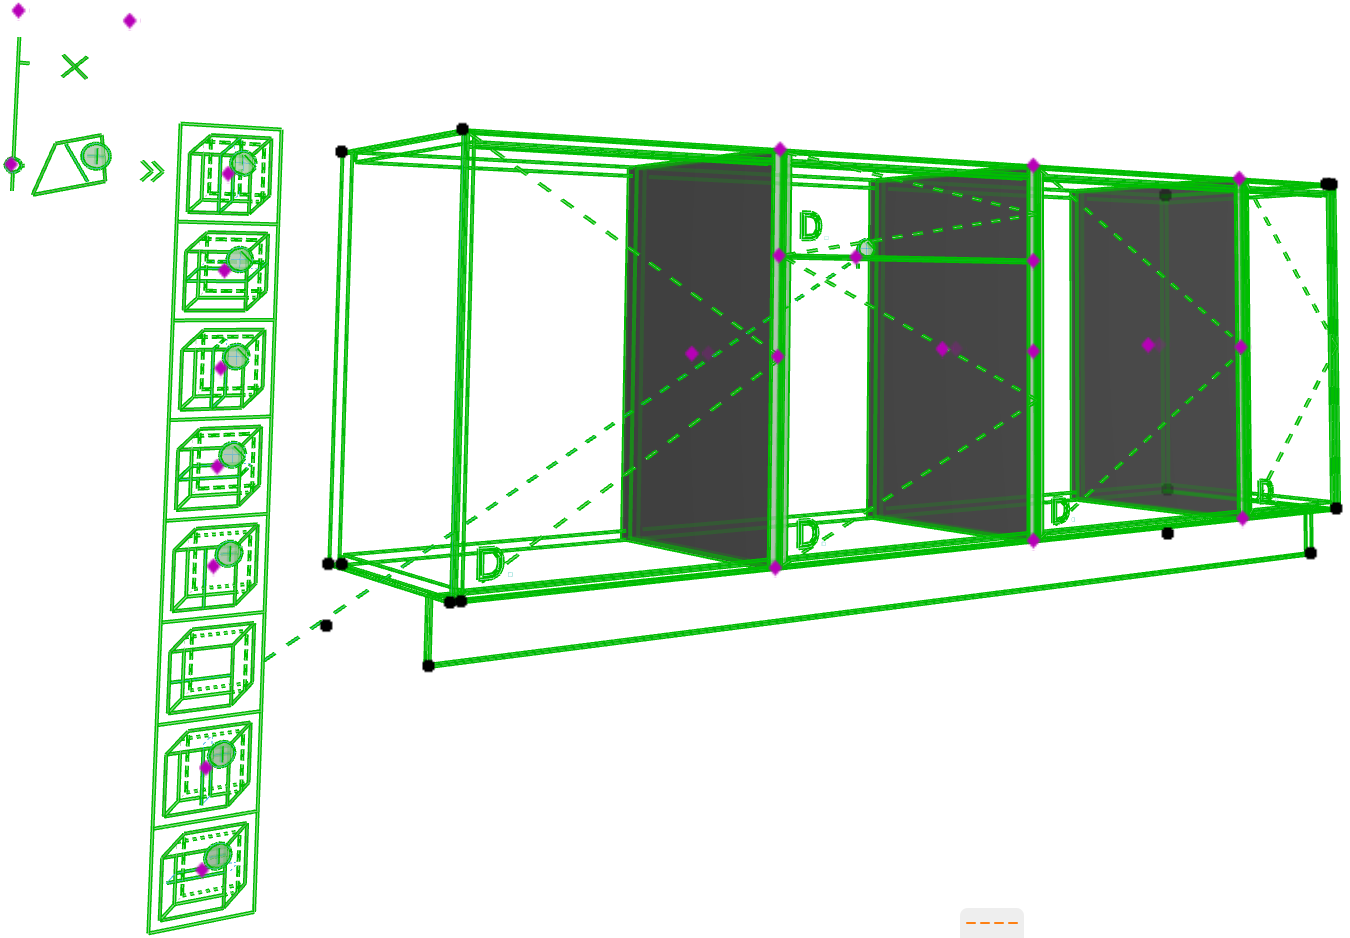
-
You can continue to add any number of partitions. Once you’ve finished, move the palette slider to the X

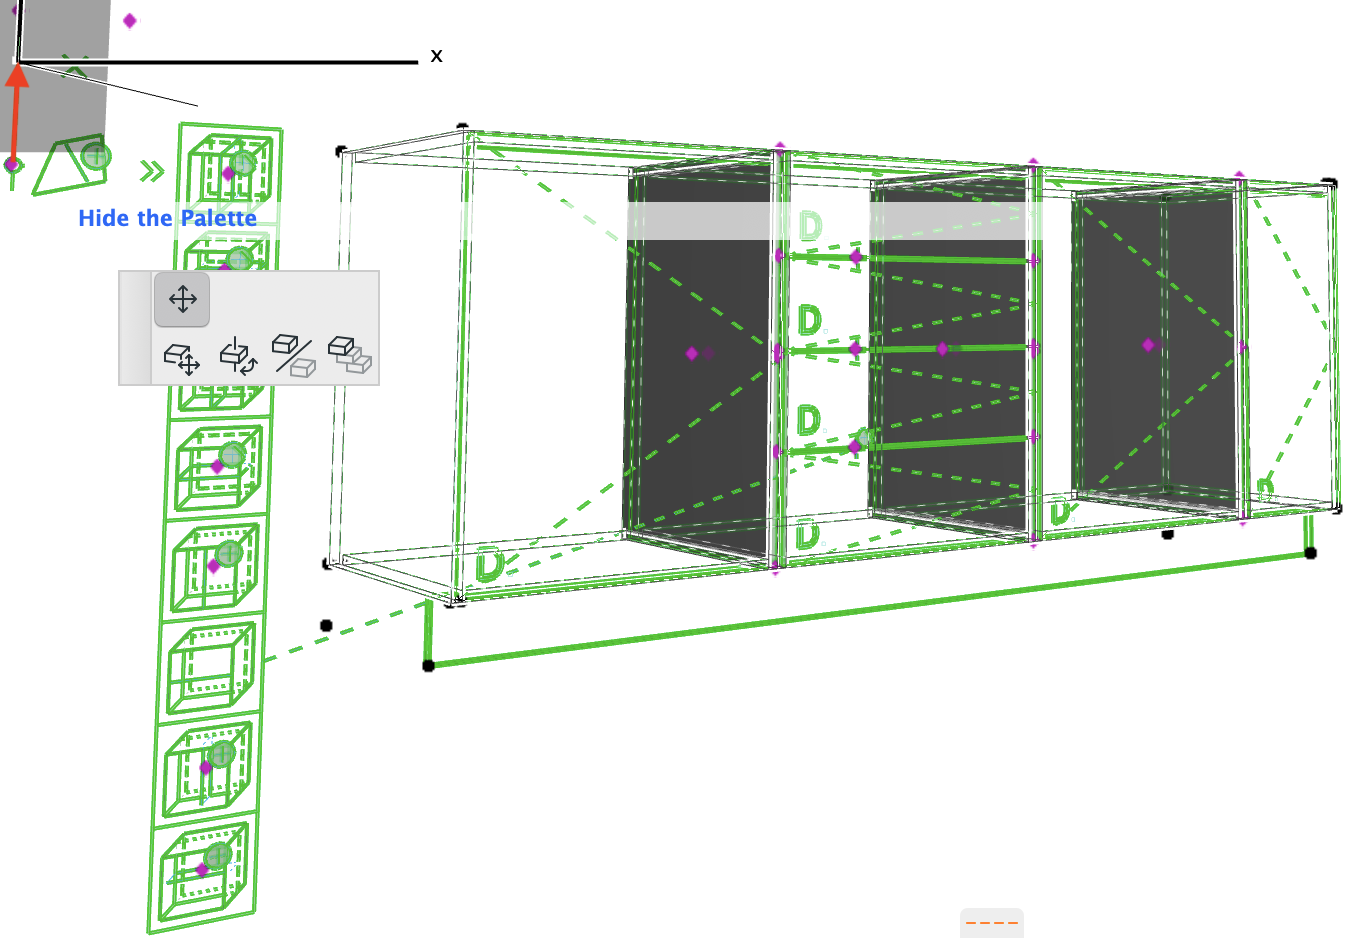
-
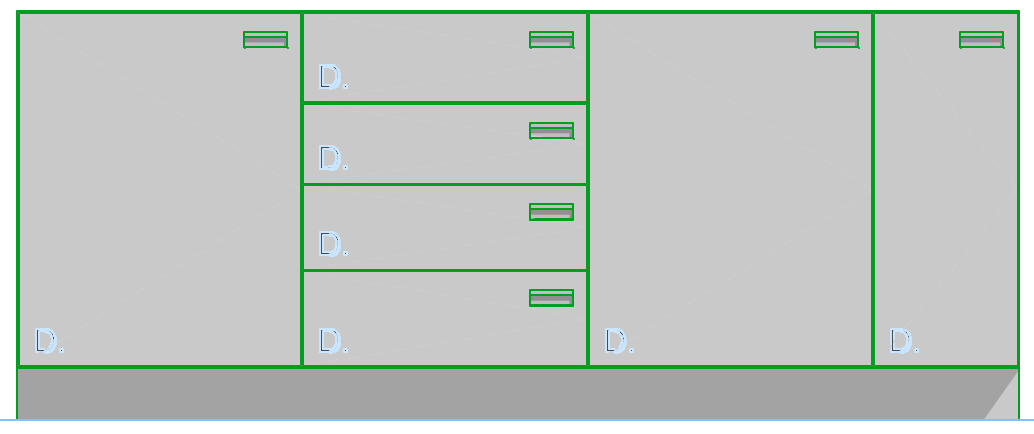
The editing palette will disappear, and the cabinet will display in full detail.
Move a Partition
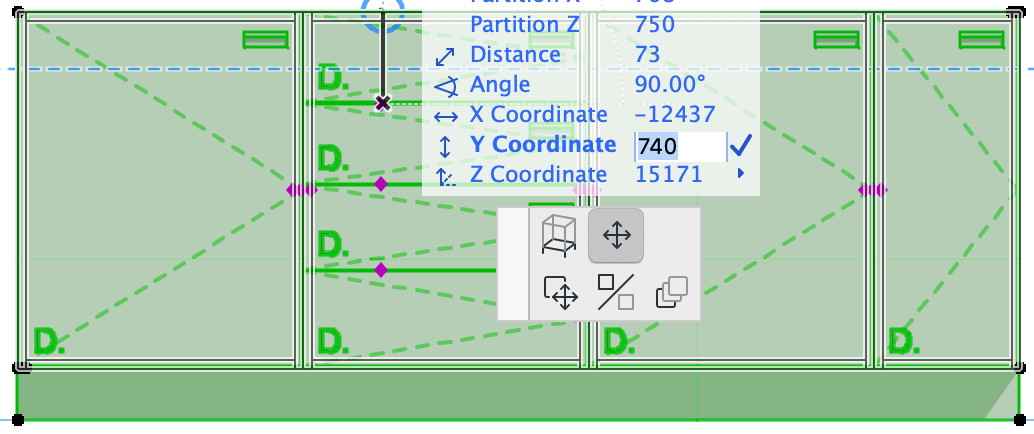
Each partition has a dynamic hotspot that allows you to move it within the cabinet.
To move a partition:
- Go to a 3D, Section or Elevation view.
- Select the cabinet.
- Drag the partition hotspot to move the partition.
Remove a Partition
To remove a partition, simply move it outside of the cabinet.
Align Partitions to Grid
Defining the precise position of a partition can be made easier by using the Align Partitions to Grid option.
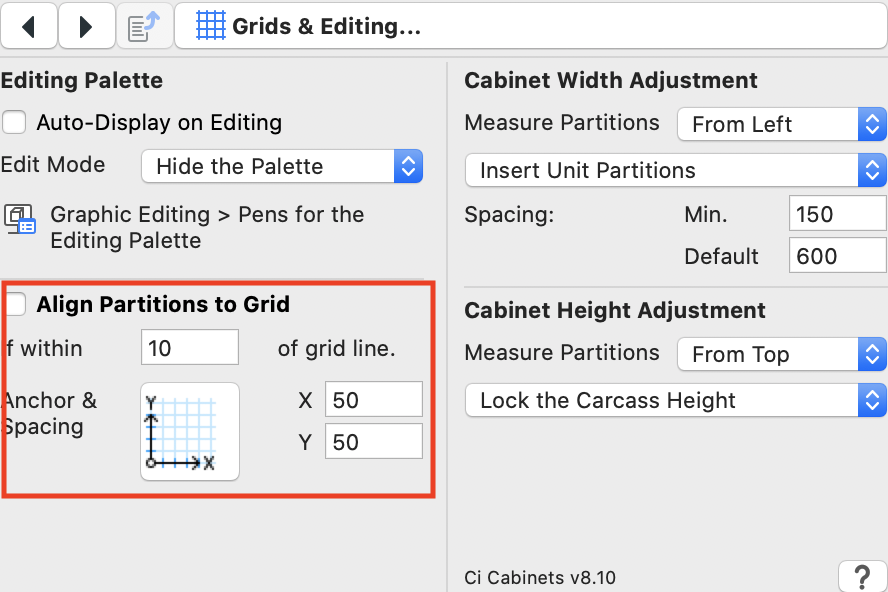
On the Grids & Editing page, set the Anchor & Spacing settings. For instance you might want to snap to the nearest 50mm in both the X and Y directions, and anchor the grid to the bottom left of the carcass. Choose a proximity for snapping (partitions within this range of a grid line will snap to the grid line).
Click the Align Partitions to Grid checkbox once you're done.
Existing partitions will snap to the grid, and when a partition is moved it will snap to the grid line if within the chosen proximity.
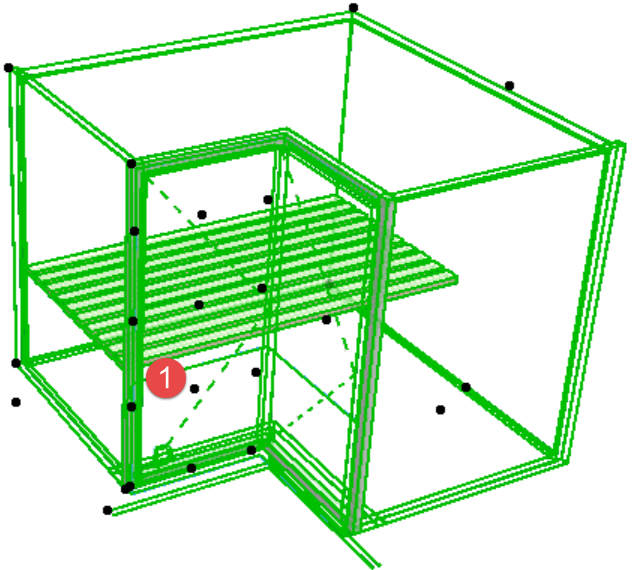
Special Functions for Shelves in the Ci Corner Unit
Shelves in the CI Corner unit can either follow the shape of the carcass (i.e. an L-shape), or they can run parallel with one or other of the two edges.
The path followed by the shelf is controlled by moving the partition hotspot:
 |
 |
 |
 |
- Hotspot at the far left of the front face – the shelf runs along the first leg of the corner cabinet.
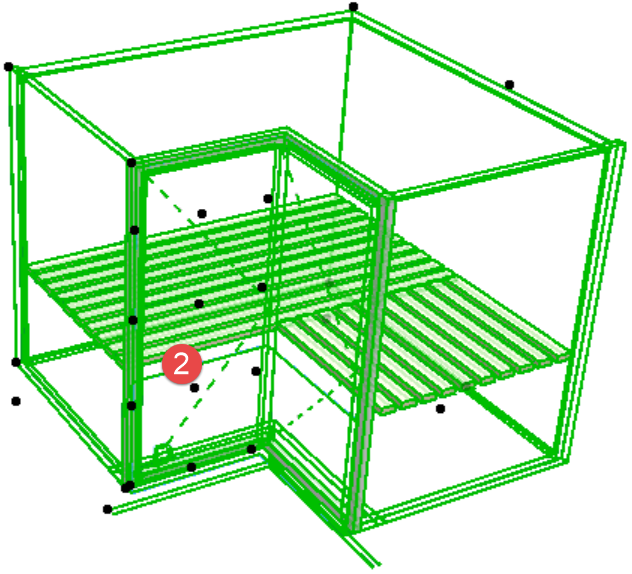
- Hotspot just left of the middle of the front face – the shelf follows the cabinet shape, with the main part parallel with the first leg of the corner cabinet.
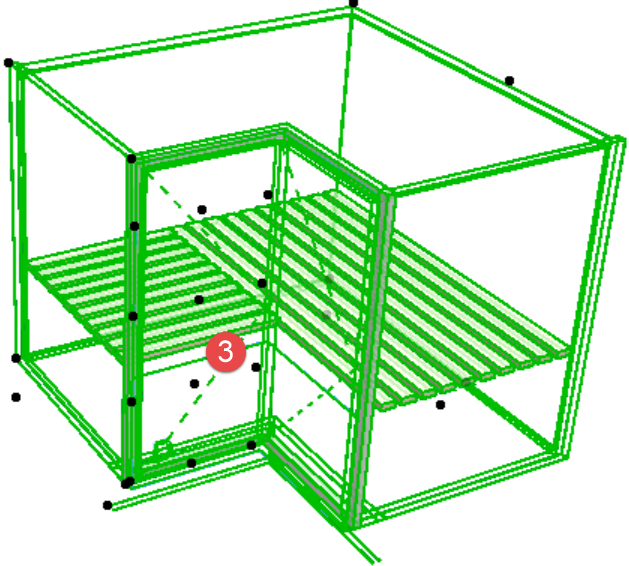
- Hotspot just right of the middle of the front face – the shelf follows the cabinet shape, with the main part parallel with the second leg of the corner cabinet.
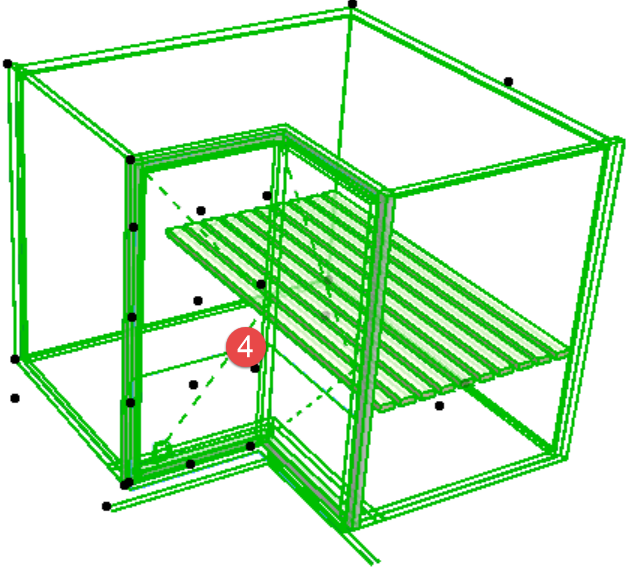
- Hotspot at the far right of the front face – the shelf runs along the second leg of the corner cabinet.
Comments
0 comments
Please sign in to leave a comment.